Building a Multiroom Chat Application in Node JS
Github:https://github.com/mehulk05/Chat-app-using-Nodejs
Live Url:https://chatapp-using-node.herokuapp.com/
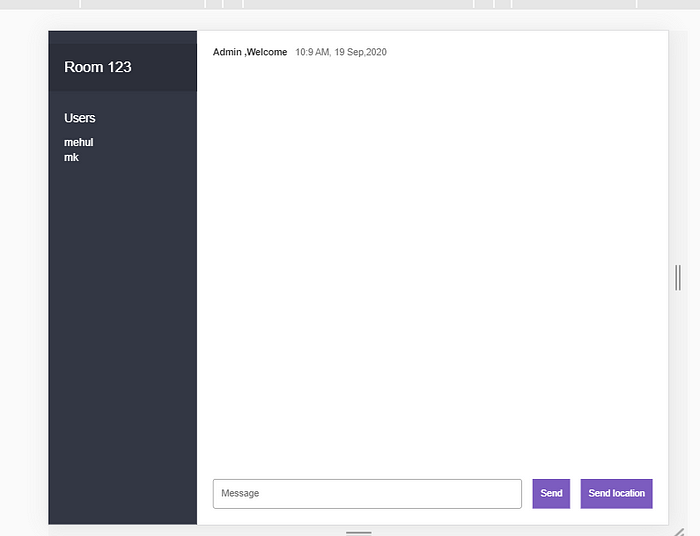
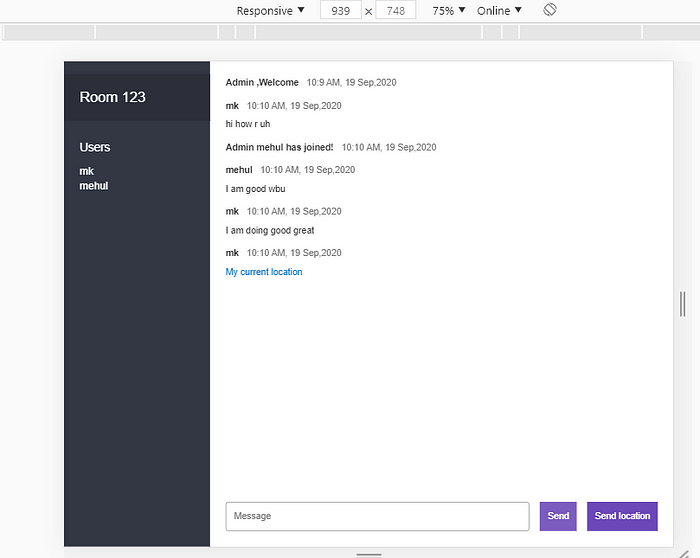
In this tutorial, we will use the Node.js platform to build a real-time chat application that sends and shows messages to a recipient instantly without any page refresh. Also, we have some validations like if the username is taken then we will have to choose some other username. If two users are in the same room then only they can see the message of each other
Before we start, let’s have a quick look at the prerequisite
Prerequisite:
- Basics of Node.js
- Good understanding of Javascript
- Basics of Jquery
Node.js
Node.js is an open-source, cross-platform JavaScript run-time environment that executes JavaScript code outside the browser. The most important advantage of using Node is that we can use JavaScript as both a front-end and back-end language.
As we know, JavaScript was used primarily for client-side scripting, in which scripts were embedded in a webpage’s HTML and run client-side by a JavaScript engine in the user’s web browser.
Node.js lets developers use JavaScript to write Command Line tools and for server-side scripting — running scripts server-side to produce dynamic web page content before the page is sent to the user’s web browser.
Getting Started
Create a directory for the application, open the directory with your favorite editor(I personally prefer VSCode):
mkdir chatApplication && cd clientNext, let’s initialize the directory as a Nodejs application.
npm init -yFolder Structure

Chat Application Architecture
Chats architectures are commonly thought based on a server-side application that will support the requests coming from the client (in this case, some JavaScript/Ajax) and deal with the business logic along with database storing, event processing, queues, etc
Since not all the versions of all browsers (the old ones) support WebSockets, Node.js created a module which is used for all transport protocol. So in this article, we will create a project to get to know the basics of Socket.IO and what it can offer us, without the use of a database, Ajax, or another back-end language… only JavaScript, Node.js, and jQuery.
About Socket.IO
Socket.IO enables real-time, bidirectional, and event-based communication.
It works on every platform, browser, or device, focusing equally on reliability and speed.
Building the Server-side
To install socket.io:
npm install -s socket.iowe also need an HTTP package for Socket.io to work:
npm install -s httpAdd the following code to server.js:
var http = require(‘http’).Server(app);
var io = require(‘socket.io’)(http);
And we can create a connection:
io.on(‘connection’, () =>{
 console.log(‘a user is connected’)
})
In the index.html add the following tag:
<script src=”/socket.io/socket.io.js”></script>Complete index.js
const path = require('path')
const http = require('http')
const express = require('express')
const socketio = require('socket.io')
const { generatemsg, generateLocation } = require('./utils/messages')const { addUser, removeUser, getUser, getUserInRoom } = require('./utils/users')const app = express()
const server = http.createServer(app)
const io = socketio(server)const PORT = process.env.PORT || 3000const publicdir = path.join(__dirname, '../public')app.use(express.static(publicdir))//connection by serverio.on("connection", (socket) => {
    console.log("new connection")socket.on("join", ({ username, room }, cb) => {const { error, user } = addUser({ id: socket.id, username, room })if (error) {
            return cb(error)
        }
        socket.join(user.room)
        socket.emit("message", generatemsg("Admin ,Welcome"))
        socket.broadcast.to(user.room).emit("message", generatemsg(`Admin ${user.username} has joined!`))io.to(user.room).emit("roomData", {
            room: user.room,
            users: getUserInRoom(user.room)
        })
        cb()
    })socket.on("sendMessage", (msg, cb) => {
        const user = getUser(socket.id)
        io.to(user.room).emit("message", generatemsg(user.username, msg))
        cb()
    })socket.on("sendLocation", (location, cb) => {
        const user = getUser(socket.id)
        console.log(user)
        io.to(user.room).emit("locationurl", generateLocation(user.username, `https://www.google.com/maps?q=${location.latitude},${location.longitude}`))
        cb()
    })//connection drop
socket.on("disconnect", () => {
        const user = removeUser(socket.id)
        console.log(user)
        if (user) {
            io.to(user.room).emit("message", generatemsg(`Admin ${user.username} A user  has left`))io.to(user.room).emit("roomData", {
                room: user.room,
                users: getUserInRoom(user.room)
            })
        }})})
server.listen(PORT, () => {
    console.log("server s up" + PORT)
})
So skipping the import statement and jumping right to the socket part lets understand basic terminology
- io.on(“connection”): Here is where we set up Socket.IO. It is listening for a ‘connection’ event and will run the provided function anytime this happens.
- io.emit(“event_name”): to send a message to all the connected clients. This code will notify when an event occurs to the server.
- io.to(“socketId”): when we want to emit to only a particular client in that case we can use io.to
- socket.on(“disconnect”): When the connection is dropped the disconnect event will fire.
Summing up, we are creating a connection and then we are executing code for two events if occur from the client-side i.e sendMessage and sendLocation.
HTML page
<!DOCTYPE html>
<html>
<head>
 <title>ChatJS</title>
 <link rel="stylesheet" type="text/css" href="/css/style.css" />
</head>
<body><div id="message"></div>
 <form id="chat">
 <input type="text" id="msg_text" name="msg_text" />
 <input type="submit" value="Send!" />
 </form><button id="getLocation">Send location</button><script src="/socket.io/socket.io.js"></script>
<script src="/js/chat.js"></script></body>
</html>
Our index, for now, will only deal with a div called message that is where all the messages exchanged in the chat will be arranged. Then, we have soon after a form with a text box and the button of message sending. A very simple chat structure so far. So using our client-side js now we will send our current location and message
Client-Side Js:
const socket = io()
const $msgForm = document.querySelector("#chat")
const $geoLocationButton = document.querySelector("#getLocation")$msgForm.addEventListener("submit", (e) => {
    e.preventDefault()let msg = document.querySelector("input").value
socket.emit("sendMessage", msg, (error) => {

        if (error) {
            return console.log(error)
        }console.log(msg ,'Message delivered!')
    })
})// sending current location$geoLocationButton.addEventListener("click", () => {
    if (!navigator.geolocation) {
        return alert("no browser supoport")
    }navigator.geolocation.getCurrentPosition((position) => {socket.emit("sendLocation", {
            latitude: position.coords.latitude,
            longitude: position.coords.longitude,
        }, (location) => {
            console.log(location, "location shared", position)
        })})
})
So here we have written client-side js, as we can see right now our UI is not there which I am skipping and provide the Github repo. So when a particular event will occur we send this message to the server-side and we will display this message in the console.
Conclusion:
So that’s the end of our app. As you can see is pretty simple and it doesn’t require tons of code as I thought before building it.
The power of Socket.IO extends to more solutions that previously relied on back-end pages. Now, the inbound/outbound server response time can rely on the WebSocket protocol for more agile information exchange, enabling systems that track monitoring results or even setting real-time pricing for users.
You can find the full source code here.
Feel free to report issues and bugs and improve this code, thus making it better.


Comments
Post a Comment